Getting Started with ZFS on Solaris

If you have been following along with my series on the SunFire V100 you know that I have installed Solaris 10 Core 8/7 onto it (adding in SSH and BASH packages to make it actually useful in the real world) and have put the root volume under the control of the Solaris Volume Manager or SVM which has mirrored it under RAID 1. Now the final task for disk management is to create the ZFS storage that will exist on the large, remaining section of the disks.

Getting Starting – Prepping the Disks

Since we are not working with dedicated drive devices to use for ZFS we need to prepare some slices that we will be assigning to our ZFS pool or zpool. To complete the use of my disk space I use the format command to add a 106.44GB partition (that is block 10822 – 65533) to slice 5 on both of my drives. Now we have the space ready to be added to our first zpool.

Creating the ZPool

A zpool refers to a group of virtual (or physical) devices that will be incorporated together as a single entity under ZFS. The zpool system is analogous to logical volume management and is used instead of SVM for ZFS. Since we are working with just two drives here – as that is all that can be held by the entry-level V100 server – we are limited to working with mirrored pools. If we had three or more devices then we could opt to use RAIDZ. RAIDZ is SUN’s ZFS answer to RAID 5 but with better performance. Read Jeff Bonwick’s post for more detailed information. He explains it best.

For our simple mirroring purposes, we just use the zpool create command and select our zpool name, I chose “datapool”, and list your two slices. If you are following along on a V100 then everything should be exactly the same as mine. Feel free to use any name that makes sense for your pool.

# zpool create datapool mirror c0t0d0s5 c0t2d0s5

If all goes well you should now have your very first zpool. You can learn more about the state of your pool using zpool list and zpool status.

Creating a ZFS Filesystem

Creating our first ZFS filesystem is very easy. For my needs, I am only looking to create a single ZFS filesystem which spans the entire available space and will be eventually mounted simply as /data. For this I just need to use the simple zfs create command. Since we will probably want to be able to work with this new filesystem in the traditional manner using the commands mount and umount and by making a simple entry in the /etc/vfstab then we also need to complete the additional step of setting the mountpoint property to “legacy”. And, of course, make your mountpoint while you are at it.

# zfs create datapool/data
# zfs set mountpoint=legacy datapool/data
# mkdir /data

Add Your New ZFS Filesystem to /etc/vfstab

All that needs to be done is to open up your /etc/vfstab and add in the following line and ask Solaris to re-read the filesystem table.

datapool/data - /data zfs - yes -
# mount /data

That’s it. Now it is time to enjoy your new ZFS filesystem. Go ahead and move some shiny new files on there and try it out. Unless you are like me and would like to compress the files going onto your new partition in which case we have one last task to perform. Let’s issue the zfs set command to set our compress to on. This is very simple and straightforward.

# zfs set compress=on datapool/data

Okay, you did it. Now your filesystem is ready to be used. Enjoy.

ZFS Resources:
September 21, 2007: Oreo Day

I just realized that I never posted for Wednesday, September 19th.  Oh well.  I have no idea by now what happened then.  Nothing important, I am sure.  I went to work.  I ate dinner.  Yada yada yada.  You all know the drill.

Today is my work from home day this week.  I had to reschedule it from my usual Thursday because Oreo’s daycare providers are getting married tomorrow and they needed today off.  So Oreo is stuck at home with me today.  Yay!  Next week is going to be really tough for him though.  We aren’t sure what we are going to do about that.

It was a pretty busy day at work.  I didn’t get a chance to eat until almost two and I just ran across the street to Queen Pizza II and ran back and ate at my desk.  I did manage to do a little cleaning around the apartment, some dishes, some laundry and some cleaning out of the refridgerator.  But overall, not a lot of anything other than just sitting at me desk all day.

I ended up getting stuck working quite late – until after seven.  Dominica and I have a party to attend tonight and this made it very tough.  We didn’t manage to leave the apartment until almost eight by the time that I was able to get dressed and ready to go.

Tonight is a friend’s baby shower in Edison, New Jersey.  It takes about forty-five minutes to get down there at this time of night even though it isn’t very far away.  Getting through Newark to the interstate and then on to the Garden State Parkway and then all of the local roads in Edison really takes a while.

We had a good time at the baby shower.  It was not like traditional baby showers that we are used to where it is very uncomfortable for men to attend.  This was a totally coed and nothing weird or embarrassing baby shower with really awesome food from Moghul in Edison.  I haven’t had their food for months and boy was it good.  I have been telling Dominica about their food for a long time but she has never been able to get it before and she really enjoyed it.

We were exhausted by the time that we got home – around eleven.  Boy are we ever getting old.  It was straight off to bed for us.  I only barely get to sleep in tomorrow as I have to be online and working by eight.  I have a bit of work to do tomorrow so it is going to be a busy day.

Java Snippet: Converting a Double to Currency

A common task in any programming language, especially for students, is to convert a double or a float into a properly round and formatted decimal format appropriate for use as currency. There are two rather discrete steps in this process. The first step is to round the number appropriately. When working with currency people tend to get upset if you just start truncating numbers rather than rounding them correctly. So we will start by doing this. Then we will format the number for simple display as currency.

Rounding for Currency

// Let's make some doubles to get us started.
double unroundedNumber = 1435.4587;
double roundedNumber = 0;

// Multiply by 100 to move the decimal point to the right two digits
unroundedNumber = unroundedNumber * 100;

// Java's Math.round() method rounds to the nearest integer
roundedNumber = Math.round(unroundedNumber);

// Move the decimal point back to the left two digits
roundedNumber = roundedNumber / 100;

System.out.print(roundedNumber);

Formatting for Currency

Now that we have a nicely and accurately rounded number to work with we can work on displaying it. Manual formatting is, of course, an option but Java includes a class designed for this function and why not leverage the hard work that SUN has already done for us? Not only does Java do very nice, automatic formatting but it also has built in internationalization features. Let’s explore!

// First we need to instantiate a NumberFormat object and declare our locality (US for me)
NumberFormat nf = NumberFormat.getCurrencyInstance(Locale.US);

System.out.println(nf.format(roundedNumber));

Introductory How-To with Solaris Volume Manager

Solaris Volume Manager, or SVM, is a logical disk management suite (formerly known as Solstice Disk Suite) that is included for free with the Solaris 9 and high operating systems. SVM is an important piece of SUN’s strategy for Solaris as it provides the basic functionality for logical volume management that UNIX users have come to expect not only in the enterprise but on the desktop as well through its integration with Linux.

As a quick and dirty “how to” introduction to SVM I will walk through the process of setting up SVM for the root volume of a SUN SunFire V100 server. This server is equipped with two matched hard drives. In my example the drives are both 160GB Seagate Barracuda 7200.10. (Keep in mind that the V100’s IDE controller can only address 137GB of these drives.)

I have already done the base install of Solaris 10 having set up a 20GB root partition on slice 0, a 1GB swap partition on slice 1 and leaving the rest of the drive space free for future changes. This much will be assumed before beginning the exercise. The most important pieces here that we have a working Solaris 10 installation with a working root partition and a swap partition and that there is excess free space available as we will need to create a partition for the metabase.

SunFire V100 Notes:

Because this example is being done with the PATA based V100 server our drive naming is consitent between builds when using two drives. My primary drive is c0t0d0s0 and my secondary drive is c0t2s0d0.

Step One: Create MetaDB Slice

The MetaDB is used to store data about the volumes. It does not need to be a large partition. I have seen recommendations of 50MB – 75MB. I am going to go for the lower number as I have only a single SVM volume to manage. The data will be very small. So let’s use the format command to add a 50MB partition at slice six. If you select 50MB and then do a “print” it comes to 51.80MB on my system. Perfect.

Step Two: Replicate Drive Partitions

Now that we have our first primary drive partitioned as we would like it, it is time to set up the secondary drive to be exactly the same. Being identical is important because we are planning to mirror our root volume and performance will be impacted if we do have our partitions matching exactly.

Step Three: Create First MetaDB

Now that we have our partitions prepared for our root volume and our MetaDB we can create our MetaDB. In this example I have chosen to create one MetaDB space on each drive so that we have a backup should anything go wrong. Having only one is a bad idea. We can create both with a single command:

# metadb -a -f c0t0d0s6 c0t2d0s6

This command, if successful, will finish quietly. To verify that the change has taken place as expected you can simply:

# metadb

flags first blk block count
a u 16 8192 /dev/dsk/c0t0d0s6
a u 16 8192 /dev/dsk/c0t2d0s6

Step Four: Creating the RAID 0 Concat/Stripe

This is probably the most confusing part of the process. Although our goal is to make a RAID 1 set (a mirror) we have to first create a concat/stripe set. But don’t worry, a mirror is still our goal. We will use the metainit command to create out d11 submirror on the first drive and d12 submirror on the second drive. The naming isn’t actually required to be done in this way but this is following the SUN standard naming convention which makes working with the volumes more straightforward in the future. In this case our entire mirror is d1x with d10 being the top level and d11 being the one submirror and d12 being the other.

# metainit -f d11 1 1 c0t0d0s0
# metainit -f d12 1 1 c0t2d0s0

If you would like to verify the results of these commands you can do so by running the metastat command with no arguments.

Step Five: Creating the Mirror

Now that we have two submirrors created all we have to do is use the metainit command again to combine them together as a single mirror called d10.

# metainit d10 -m d11

Again you can verify the current state of your mirror with metastat.

Step Six: Modifying the VFSTAB and SYSTEM files

Now that we have created our working mirror (don’t get excited, we haven’t replicated any data yet so you aren’t done at this point) we need to modify to virtual file system table – /etc/vfstab – to reflect that we will be booting from the d10 mirror device rather than from the disk device /dev/dsk/c0d0t0s0. We can, of course, do this manually but SUN has provided a very simple command that takes care of this for us. It is always wise to make a backup copy of your old vfstab file just in case you are forced to revert to get the server running again.

In addition to modifying the vfstab we also need to make a small modification to the /etc/system file. Again, it is wise to backup any configuration file before modifying it although this change is very minimal. We simple need rootdev:/pseudo/md@0:0,10,blk added to the end of the file. This too is handled inclusively with the same command.

# metaroot d10

Step Seven: Reboot

# reboot

Step Eight: Attach Second SubMirror and Begin Replication

Now that the machine has successfully booted to the d10 mirror (your system did come back up, didn’t it) we can tell it to begin the process of replicating the data from the d11 submirror to the d12 submirror.

# metattach d10 d12

You can follow along as the system syncs the two mirror portions through the metastat command like you used earlier. On my V100s it took several minutes to complete on an idle system. There is a lot of disk I/O involved with this operation.

Wrapping Up

Once d12 finishes replicating your new mirror your server is RAID 1 protected and ready to go. Your new drive subsystem should be somewhat faster than your single drive of yore and you can sleep well at night knowing that your data is being mirrored. If you have been following along and building your V100 the same as mine then you will also have a second swap partition created on the second drive that you have not yet done anything with. To use this, simply add the following line to the /etc/vfstab (please only copy/paste this if you are using an identical setup to mine.)

/dev/dsk/c0t2d0s1 - - swap - no -

Thanks to Sandra Henry-Stocker at open.itworld.com whose article “Unix Tip: Mirroring your root partition with Solaris Volume Manager” supplied my introductory training in practical SVM.

September 20, 2007: Time flies like an arrow. Fruit flies like a banana.

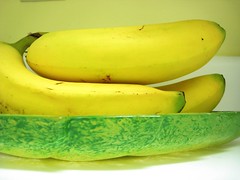
Bananas

I didn’t manage to get to bed last night nearly as early as I had hoped but I do feel that I managed to do a good job on my homework and I got that turned in before the deadline for submission.I was up and into the office this morning just in time to walk in to a major disaster. I ended up getting caught on emergency conference calls all morning and did get a chance to get off of the phone until at least eleven.

I placed a rather large Amazon order today. The reason for the order was to get a Netgear SC101 SAN device. There have been a number of bad reviews about it but most of them seem to be mostly disappointment based on a misunderstanding of SAN from people assuming that they were buying a NAS device and Google’s Summer of Code has produce Linux drivers for the device so I am quite anxious to test it out. I have those two giant 500GB PATA hard drives that I just bought last week and really need something to use them in and this is about the only thing out there. I also ordered the first three seasons of The Cosby Show, a CD from the Puppini Sisters and several IT books. New books include “Hackers and Painters“, “Everyday Scripting with Ruby“, “Release It!” and “No Fluff, Just Stuff Anthology 2007“.

Today on Craiglist in Witchita, Kansas there is a job posting looking for a pilot to do a test flight to the moon.

Dad linked me to a really cool and grammatically correct sentence: “Buffalo buffalo Buffalo buffalo buffalo buffalo Buffalo buffalo

Today was insanely busy at the office. I was totally swamped from the moment that I walked in the door and I barely got a breather all day. The phone was practically glued to my ear. I was really exhausted by the end of the day and really ready to head for home.

Dominica has a dentist appointment tonight so we are eating separately. I went right over to Food for Life before even going to the apartment and ate my dinner alone.

I came home and spent the evening learning Solaris Volume Manager which I have not worked with before. That took a little while to get all of the steps down that I needed to do since SVM varies from my experience with the Linux Logical Volume Manager or LVM in the architecture and the way that it handles the disks. But I got it figured out and got my V100 setup and running with a mirrored root volume like I had wanted.

Dominica got home quite a bit after seven. She watched some Full House and did some cleaning. She went to bed early. I stayed up working on my V100 until around eleven then headed to bed myself.

Tomorrow is doggie – daddy day as Oreo’s daycare is closed because its owners are getting married tomorrow. So Oreo is stuck at home for more than a week straight! We have no idea how we are going to manage to keep him occupied during that time. It is going to be a tough week. Luckily having me work from home today worked out really well so today is taken care of. Next week will be a challenge but at least I am not traveling like we had thought that I might have been which would have made it much harder.

We are not traveling this weekend either. We are actually home for the whole weekend!